so after we painted the living room this summer, we replaced the white blinds with a lovely bamboo shade. two thumbs up, looked good. except..at night. totally see-through. our across-the-street neighbors probably saw a leettle bit more of us than they'd like, what with those late night snack trips to the kitchen in our skivvies and i-forgot-to-get-my-jeans-from-the-dryer-before-gettin-nekid incidents. oops. something had to be done.
enter target.
on saturday, i picked up a package of
blackout drapery liners for $25. in an uncharacteristic act of preparedness, i'd previously measured all of the windows/rooms/doors in the house and stashed it in my purse for just such an occasion, so i figured that two 27 x 60" panels would cover my window, lengthwise.
chez stone, i took the bamboo blind off the window and laid it on the floor. here it is on top of the two carpet remnants we've got home on approval (i think we're going to go with the more neutral one on the left for the living room, you like?). one blackout panel is laid across the length of it.

to get down to business, i moved to the office/studio to be a) closer to my sewing machine and b) further from my dogs' tendency to lie on top of floor projects. i sewed the two blackout panels to each other along their length. the material was thick - kinda suedesque - and i may or may not have broken a needle. so, be careful of that. theoretically.

i wanted the blackout lining to end at the first line of stitching running down the bamboo blinds, so i lined up the hemmed "bottom" (now side) of the joined panels with the stitching on one side of the blind, then folded the excess on the other end to line up with the stitching on that side. below, you can see the "top" end of the panels with the trim meant to attach to your drapes - this is the end i removed. the hem at the other end was 7" wide, so i measured 7" and cut the other side, then sewed it down to make matching hems on both sides. capishe?

now, the liner was ready to attach. when attaching, be sure to place the lining UNDER the ropes that raise and lower the blinds, like so:

otherwise they won't roll up with you're finished. and that would be lame. when my liner was all lined up on my shade, i attached it with fabri-tac, which said it would permanently attach a variety of substances, including fabric (check) and wood (check). sweet deal. totally worked.
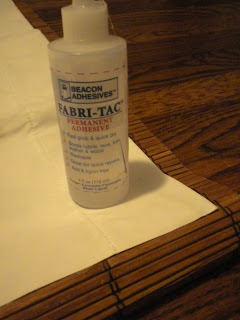
i glued along the top edge and both sides, leaving the bottom unglued because i was a) tired of gluing b) aware that it would always be rolled up in the bottom of the shade even when it's all the way down, because the shade is longer than the window. be sure to put something under the blinds when gluing, as it can leak through the slats, and you don't want it to stick to your brand-newly-refinished hardwood floors. i managed to avoid that mistake thankyouverymuch, just wanted to warn you. after everything was sewed and glued, it looked nice and neat, like it was meant to be:

and now instead of this:

(see our pod? it's still there. i'd rather not talk about it.)
we have this:

ta-da!! no more see-through! no more free shows for the neighbors! good news. i actually didn't mind the see-throughness, but it was a serious privacy issue, especially since we converted the den into the dining room and moved the tv to the living room. we'll be spending a lot more time in here now, and we don't want everyone on the street up in our bidness all the time. i've got a curtain project in the works too, so stay tuned.
lagniappe: behold captain fantastic and the big dogs in the guest room (now the studio/office) two weeks ago in the midst of moving all the furniture out. notice the cream wall-to-wall carpet. and the adorableness.

you want more? can you handle it?

gooooooooood dooooooogs. snuggling daddy. aaaawww.
and here, friends, was the new studio/office last week:
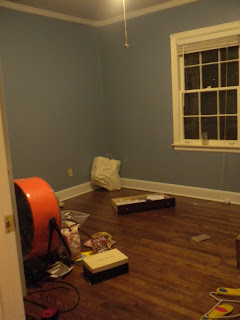
look at those floors! ooooooh! aaaaaaah! ignore the midst-of-moving-back-in-detritus littering the place and focus on how that stain looks so gorgeous with the white trim and blue walls. i heart it.


 stripping. wallpaper.


 wooho...


 (ok so that's big and honking...but pretty, no?)


 from pottery barn:

 from julian chichester:


 whatever shall i choose? most likely, the closest cousin to one of the above that i can find rotting in the corner of an antique store and paint silver. and lo and behold if my buddy get your martha on didn't post this very same day about a silver-leaf-over-gold-paint treatment that would totally give me the finish i'm digging. great minds, friends, great minds. anybody else have a similar big-bed-little-room conundrum? seen a pair of tables on your neighborhood curb? glad it's friday? can i get an AMEN?


